


After relocating to – and fully furnishing – two spaces (in two countries) over the past year, it’s safe to assume we are no longer fucking around when it comes to DECORATING ON A BUDGET.
When getting the Swim Club ready to rent, we opted for high-end-everything because we wanted to share a stunning, perfectly curated space with YOU, while supporting makers in the local community. Now in LA, working on a space just for us, we have the opportunity to get a little more bootstrap with our decor at no risk to our brand reputation ;).
Naturally, we had to try that trendy Tile Table DIY that’s got interior design enthusiasts SWOONING across the nation.
And they’re swooning for good reason.
Inspired by what I can only assume is a very chic 90s bathroom, these sturdy (read: stupidly heavy) pillar-like shapes serve as beautiful styling surfaces, bedside tables, plant stands, and beyond.
These tables first caught our eye on the interior design blogs we scour for inspiration, and then caught our attention in a more attainable way when we saw some dude selling them on Marketplace for $150 and up. We ALMOST bit the bullet and messaged him to custom build ours, but then we were like… Wait a minute –
COULD WE DO THIS?!
We are *not* avid home DIY-ers, nor are we at all versed in… building things… but it felt like a fun thing to spend a weekend on and the payoff was well worth it.
I’m not gonna bullshit you and try to sell the “pride we feel” for making something with our bare hands, but at MINIMUM I am extremely impressed that we didn’t fuck them up. We also saved a couple hundred bucks compared to opting for Marketplace guy, so, we’re calling that a win.
BUT HOOOOW DID THEY DO IT!?
In a few simple steps with the support of our friendly neighbourhood Home Depot.
If you’re not one for instructions, scroll through the pics and watch the video here. If you want the gritty deets and might *actually* try this – read on:

*The* Tile Table DIY: Oh Sierra Edition
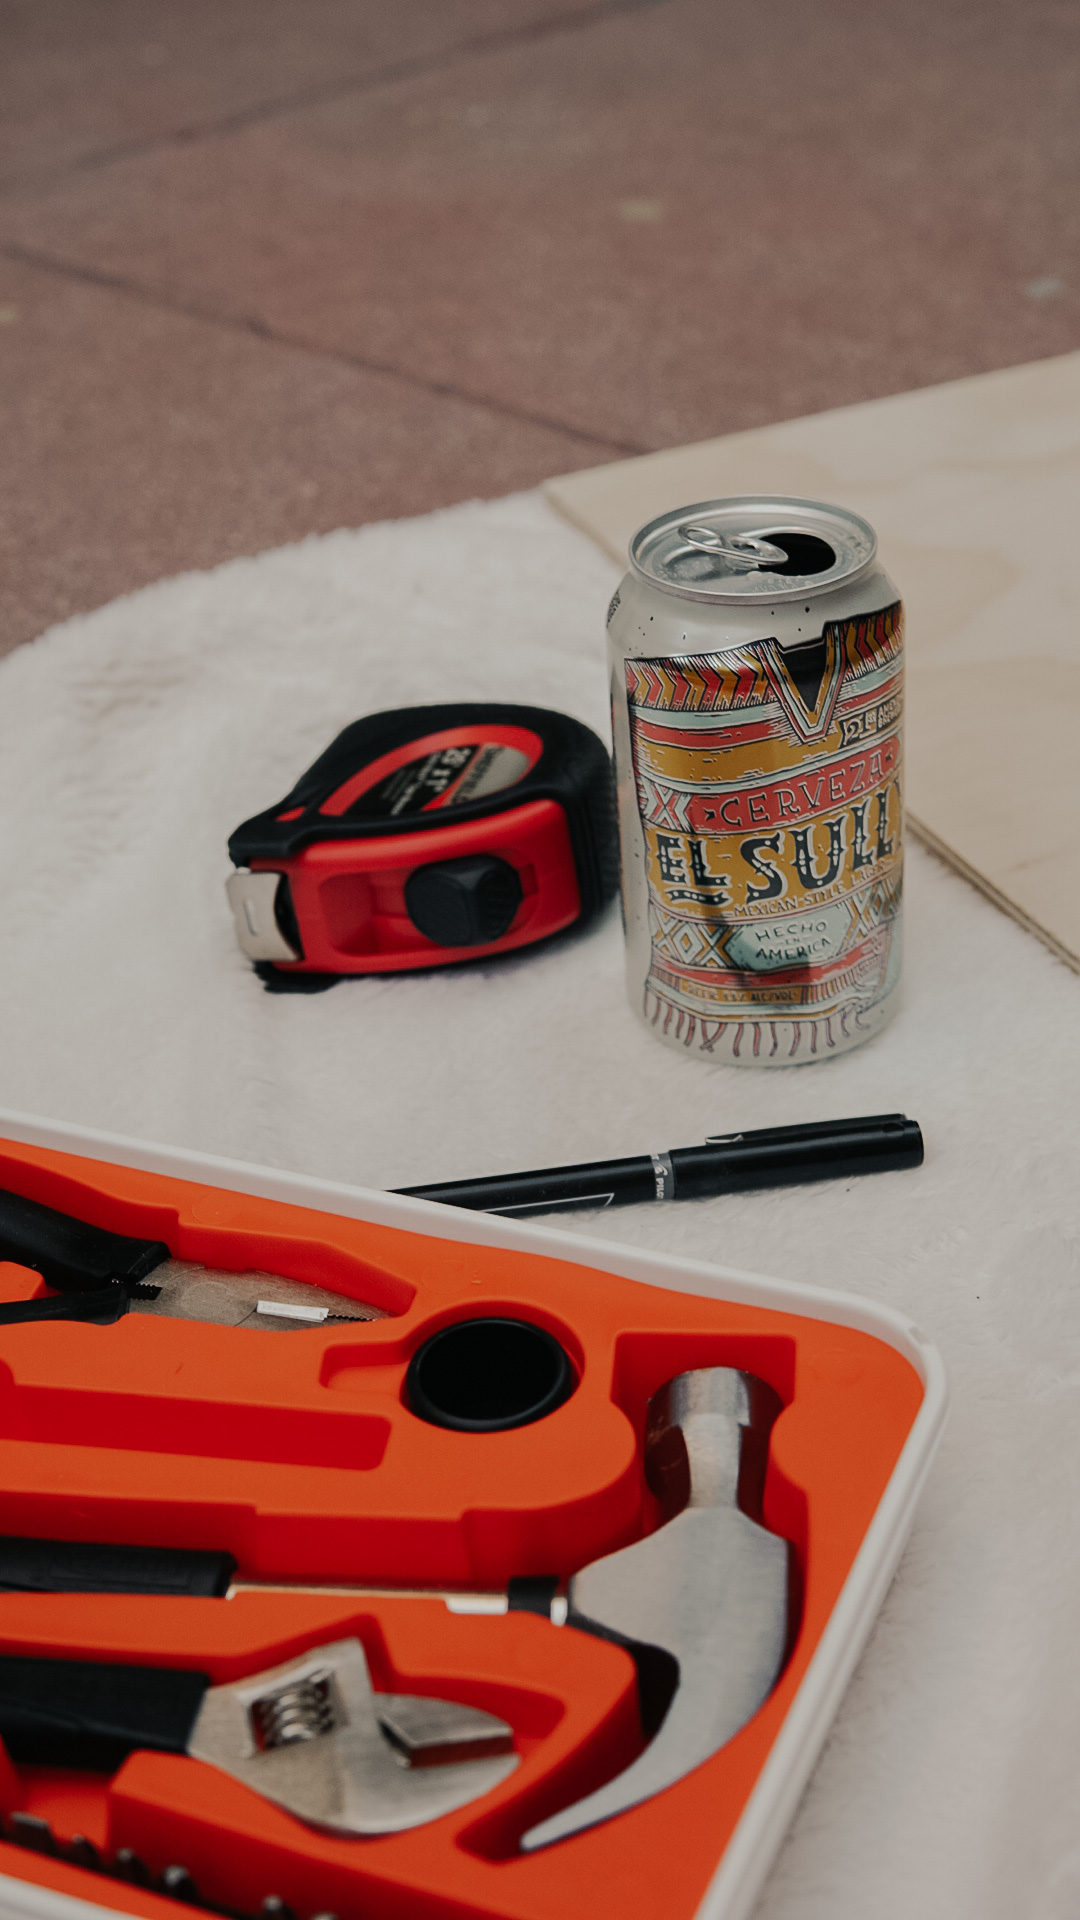
STEP ONE // SUPPLIES
- Tile sheets of choice (we chose “white” but it’s more like a marble)
- Plywood: you’ll need 5 pieces per box. We went for measurements by the foot, since the tiles come in those dimensions. For our taller table, we went with 2 feet high, 1 foot wide, and a 1-foot x 1-foot top (no base).
- When cutting the wood, you need to account for some overlap so the planks will *not* all be equal in size. You’ll need two side panels in the full height + width, and the top in its full size, and then two of the side panels will need their width to be trimmed slightly. Our plywood was a 1/2 inch thick, so we reduced the size of those two side panels by 1/2 inch. So, to recap in simpler terms, we had 2 long panels at 12 inches wide each, and 2 long panels at 11.5 inches wide. The top panel was a square at 12 inch x 12 inch. THERE YA GO.
- Brackets + TINY screws (we got 1/4 inch, but if there was a smaller option we could have used that!).
- Screwdriver (the wood is so soft, a drill would have been overkill).
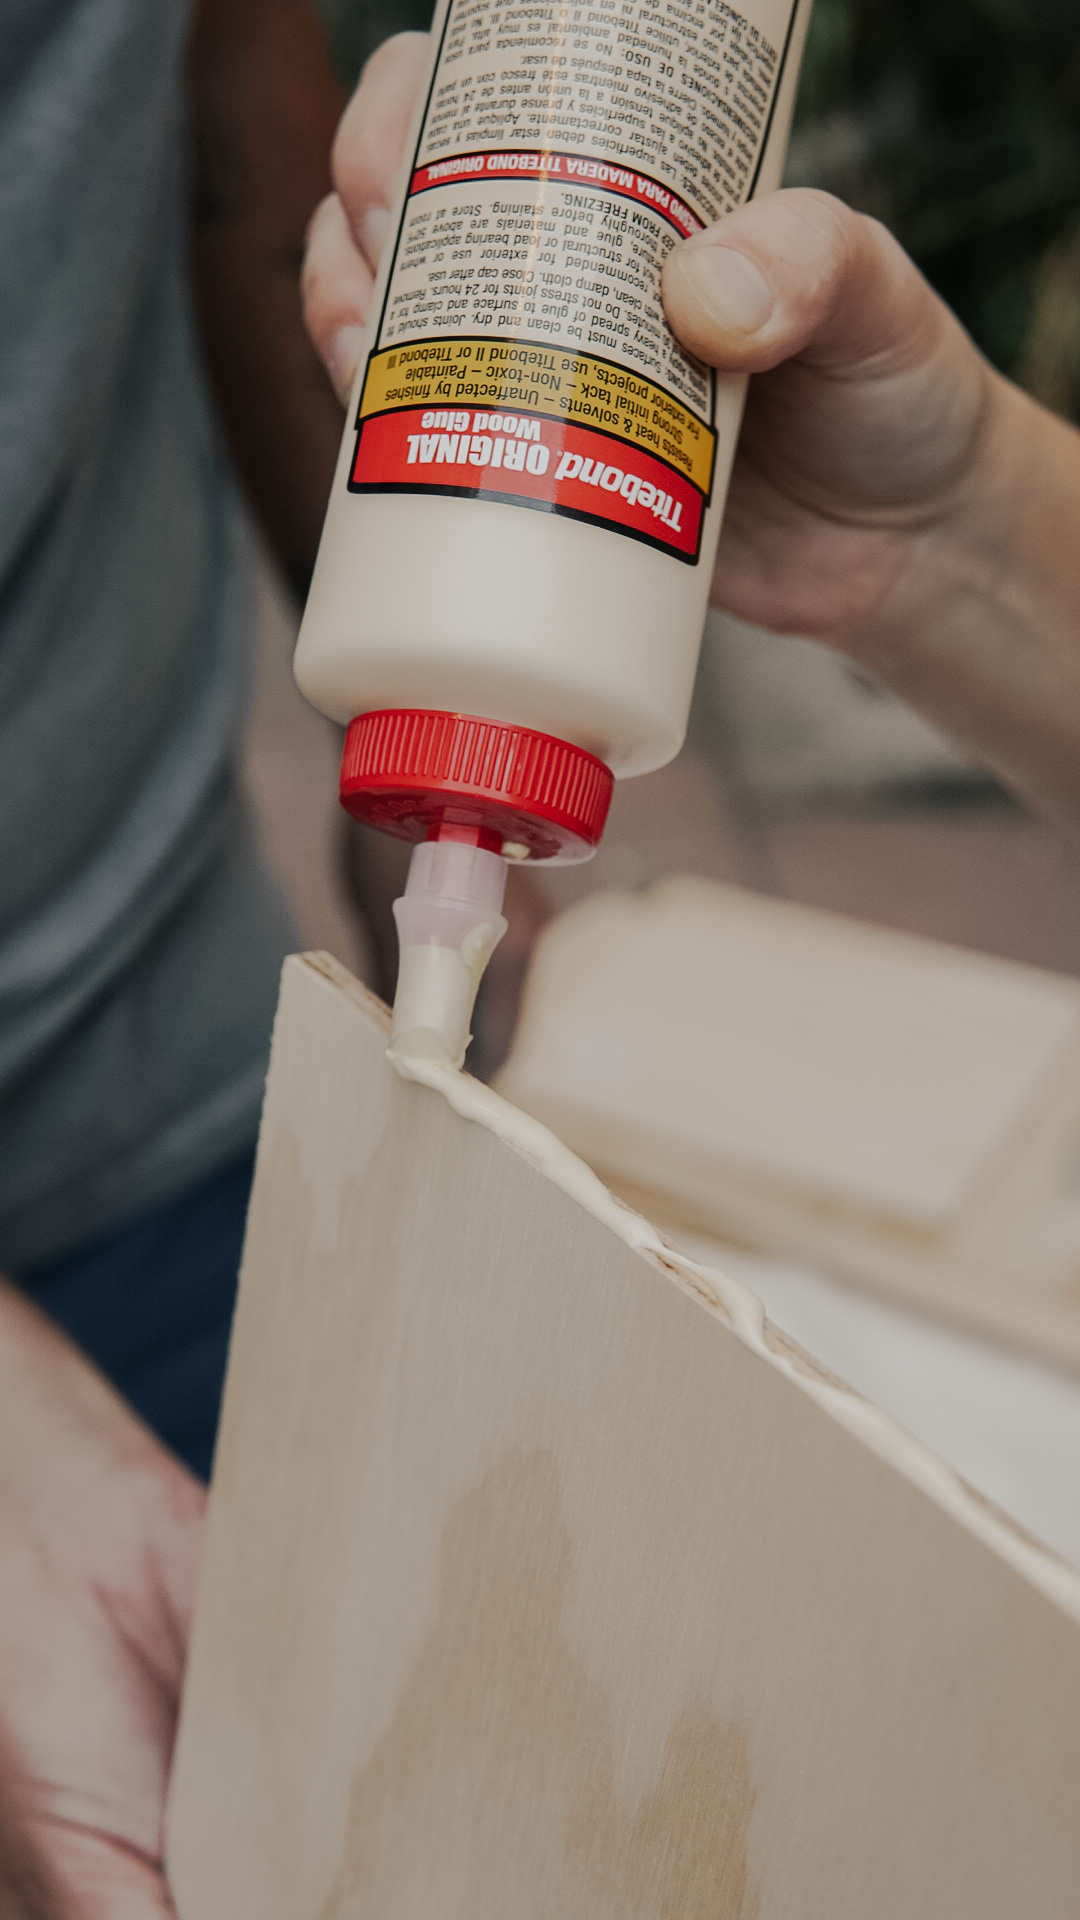
- Wood glue
- Measuring tape
- Sandpaper (optional)
- Tile adhesive
- Premixed tile grout
- Tile sponge
- Grout float
- Trowels
- Bucket with water
- Microfibre cloths
- Beers, duh.
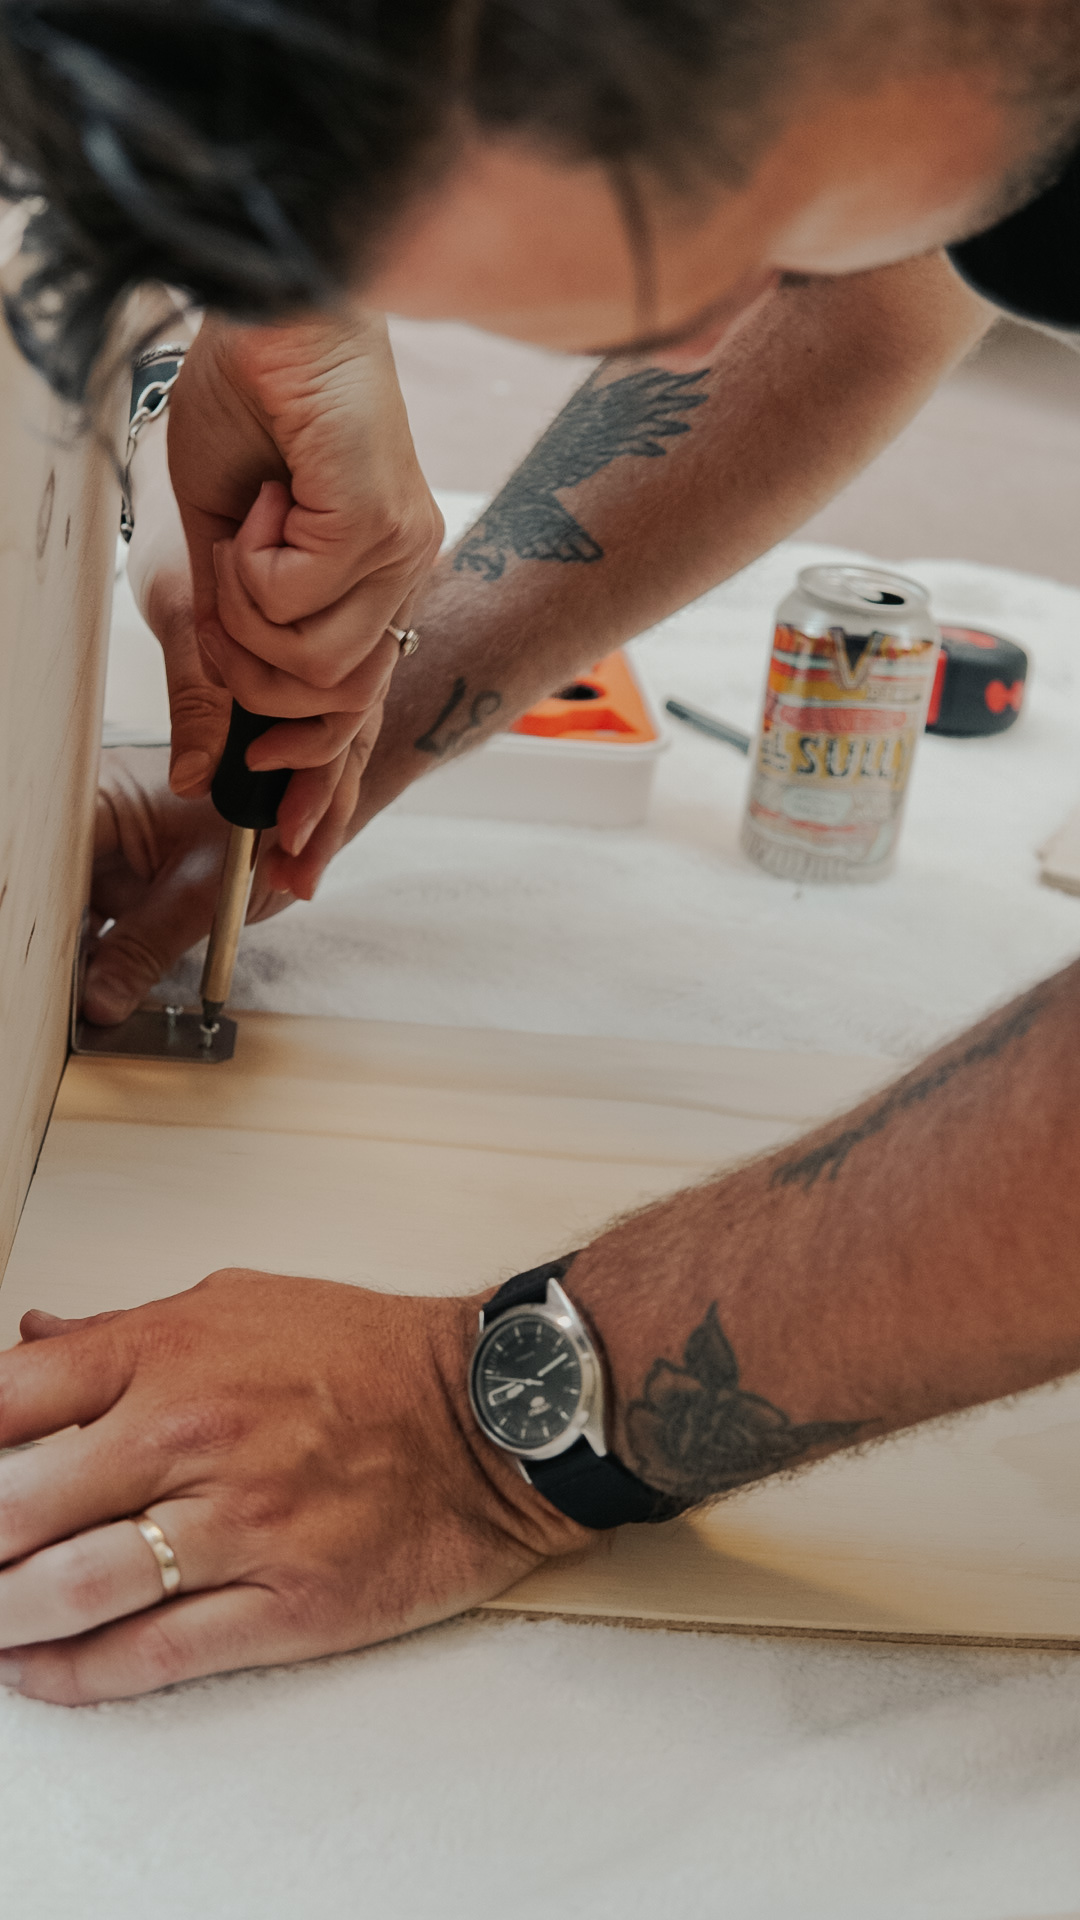
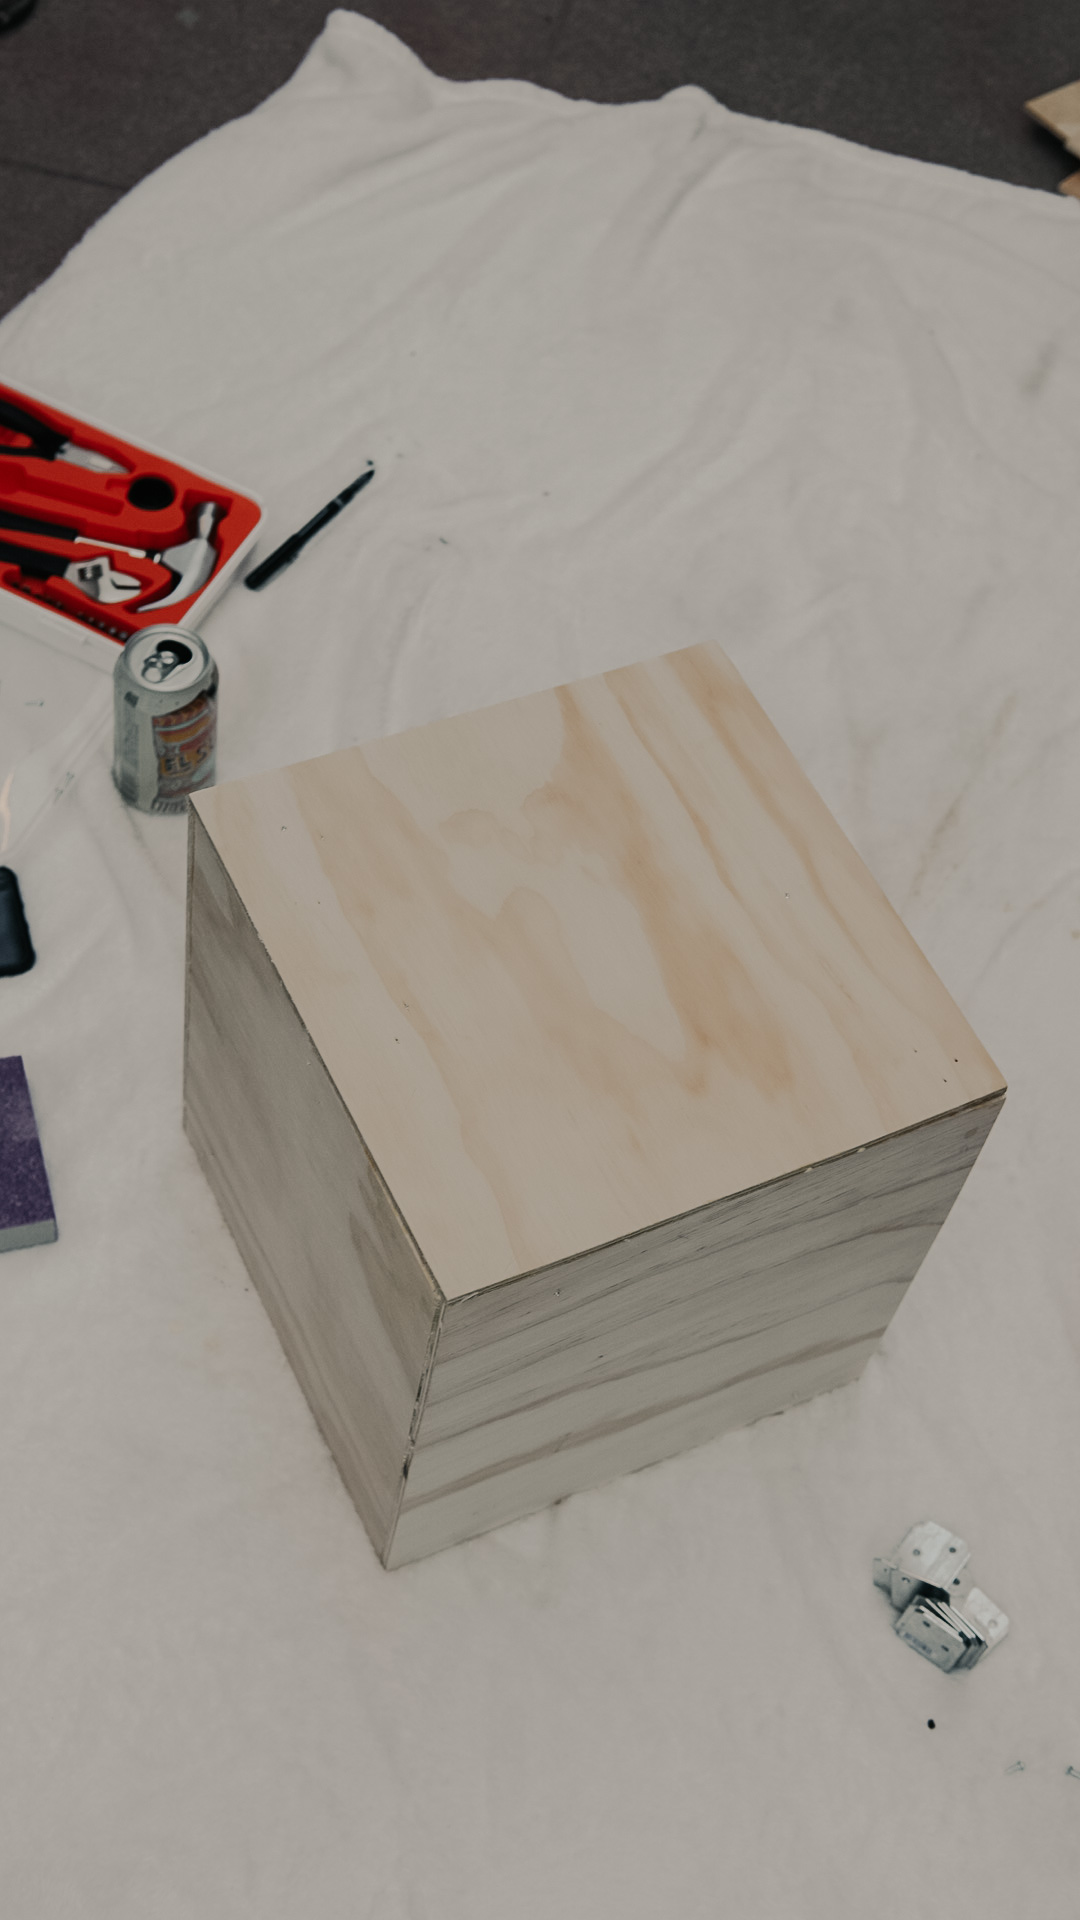
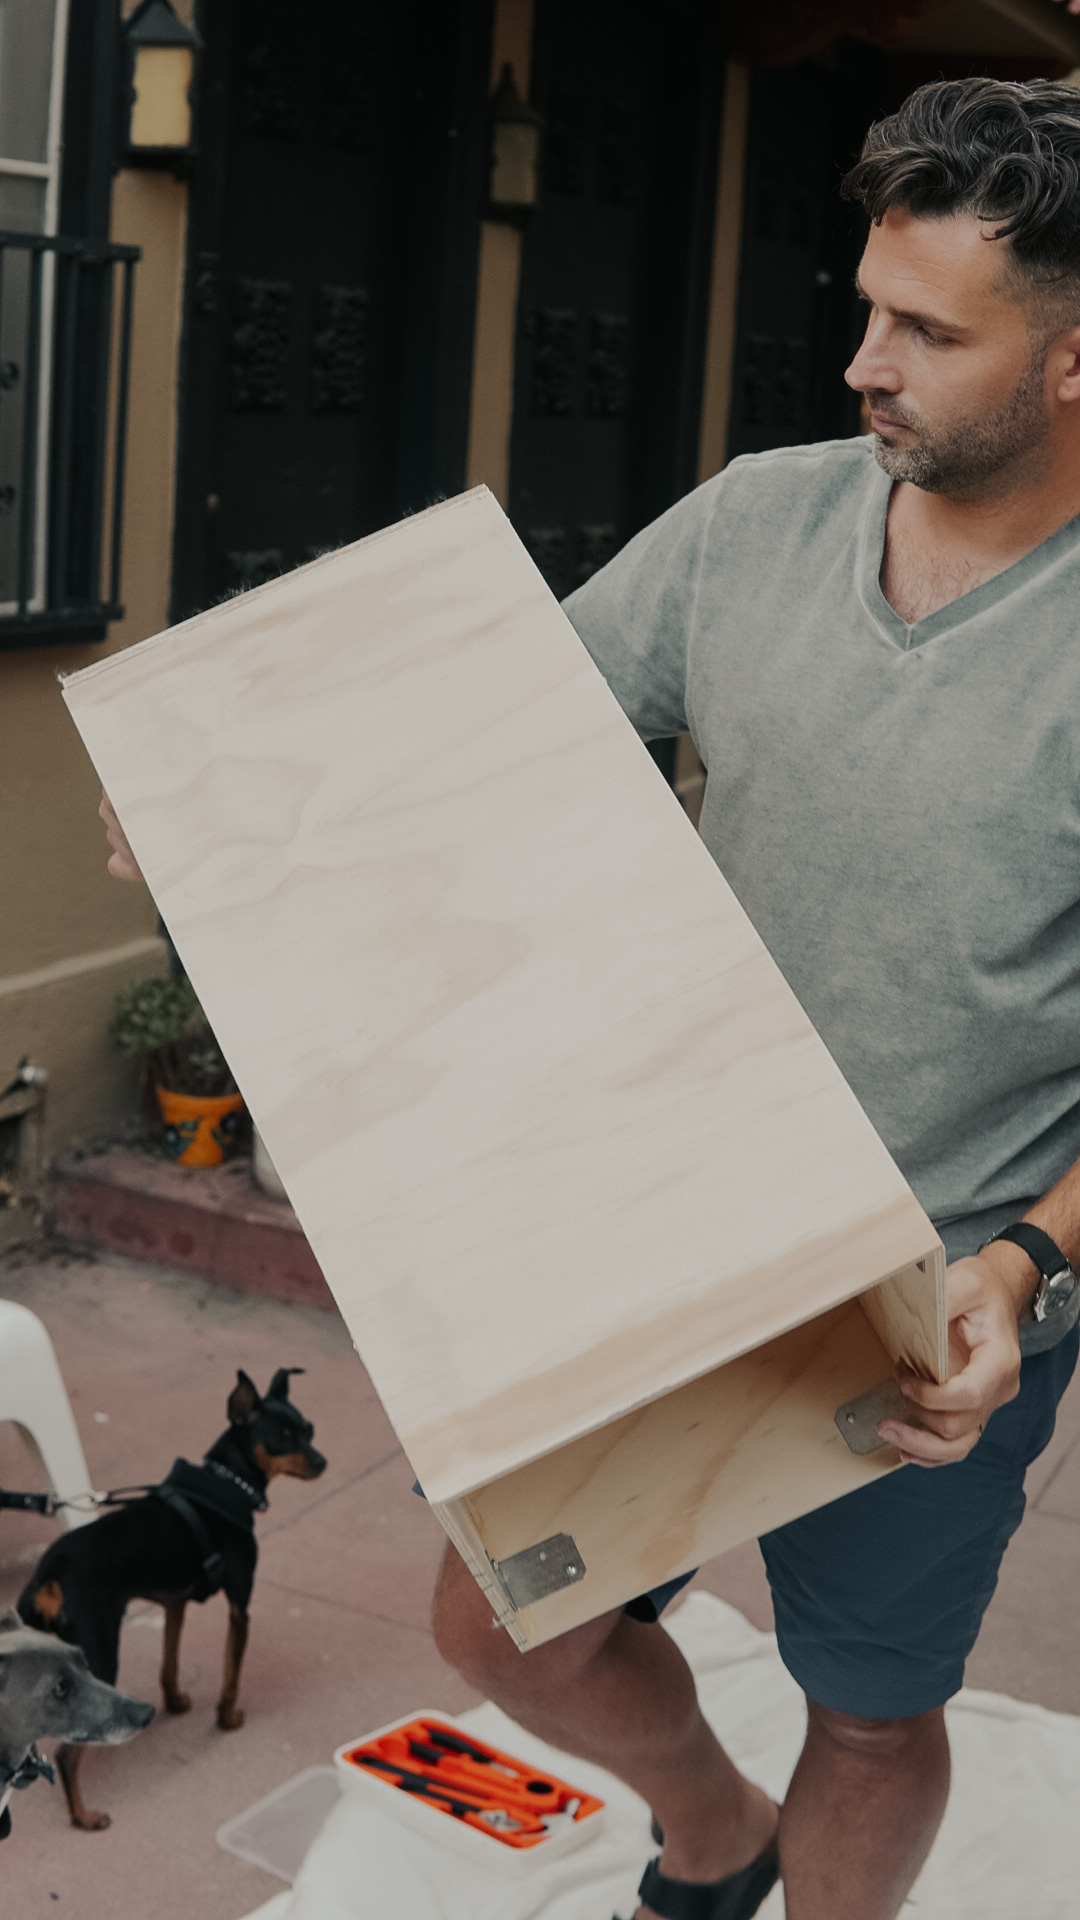
STEP TWO // BOX ASSEMBLY
This is what makes the Tile Table DIY so doable. Assembling plywood boxes is a real smooth process. Affixing with brackets and screws, and reinforcing with wood glue, it’s very straightforward to imagine how it came together. But, in interest of ease – glue first. Start with the sides. Make sure you CHECK to ensure the correct sized pieces are in place. Bracket as you go. Make sure you have help holding it all together throughout the process.
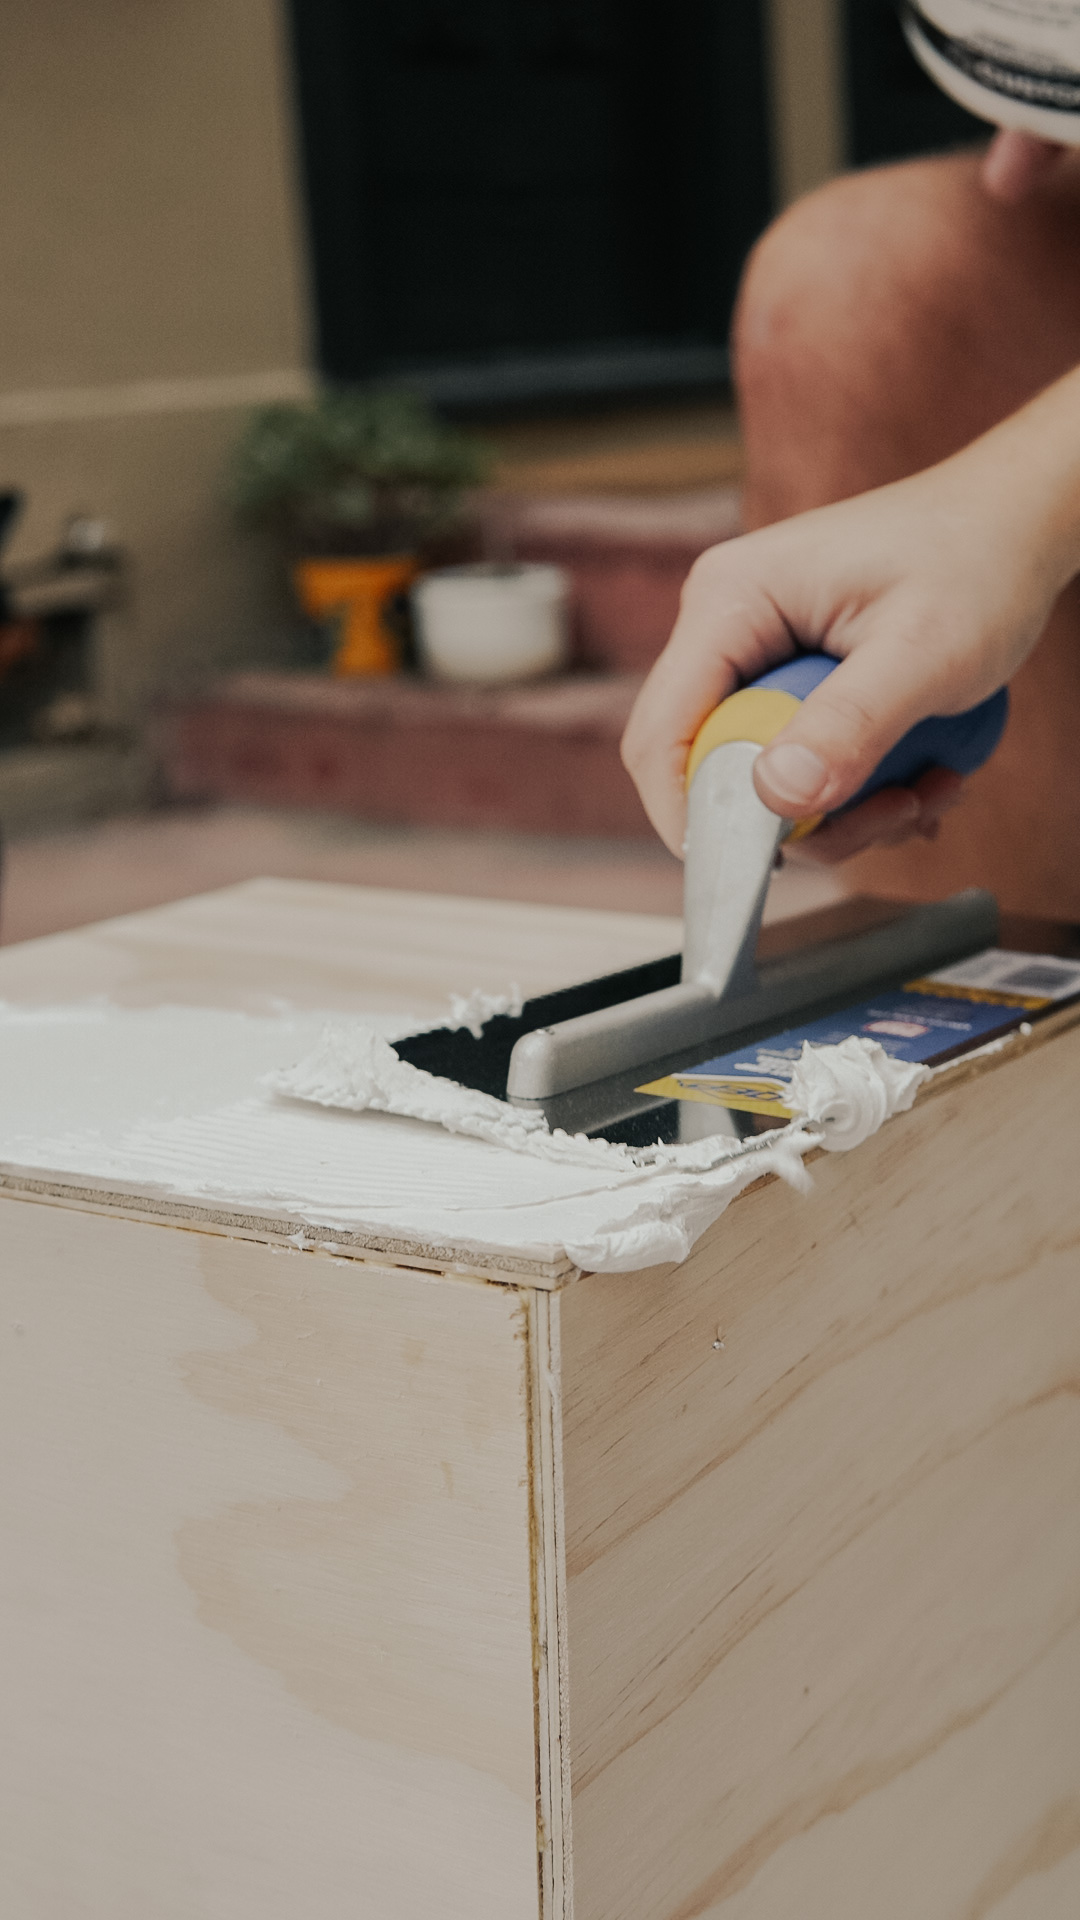
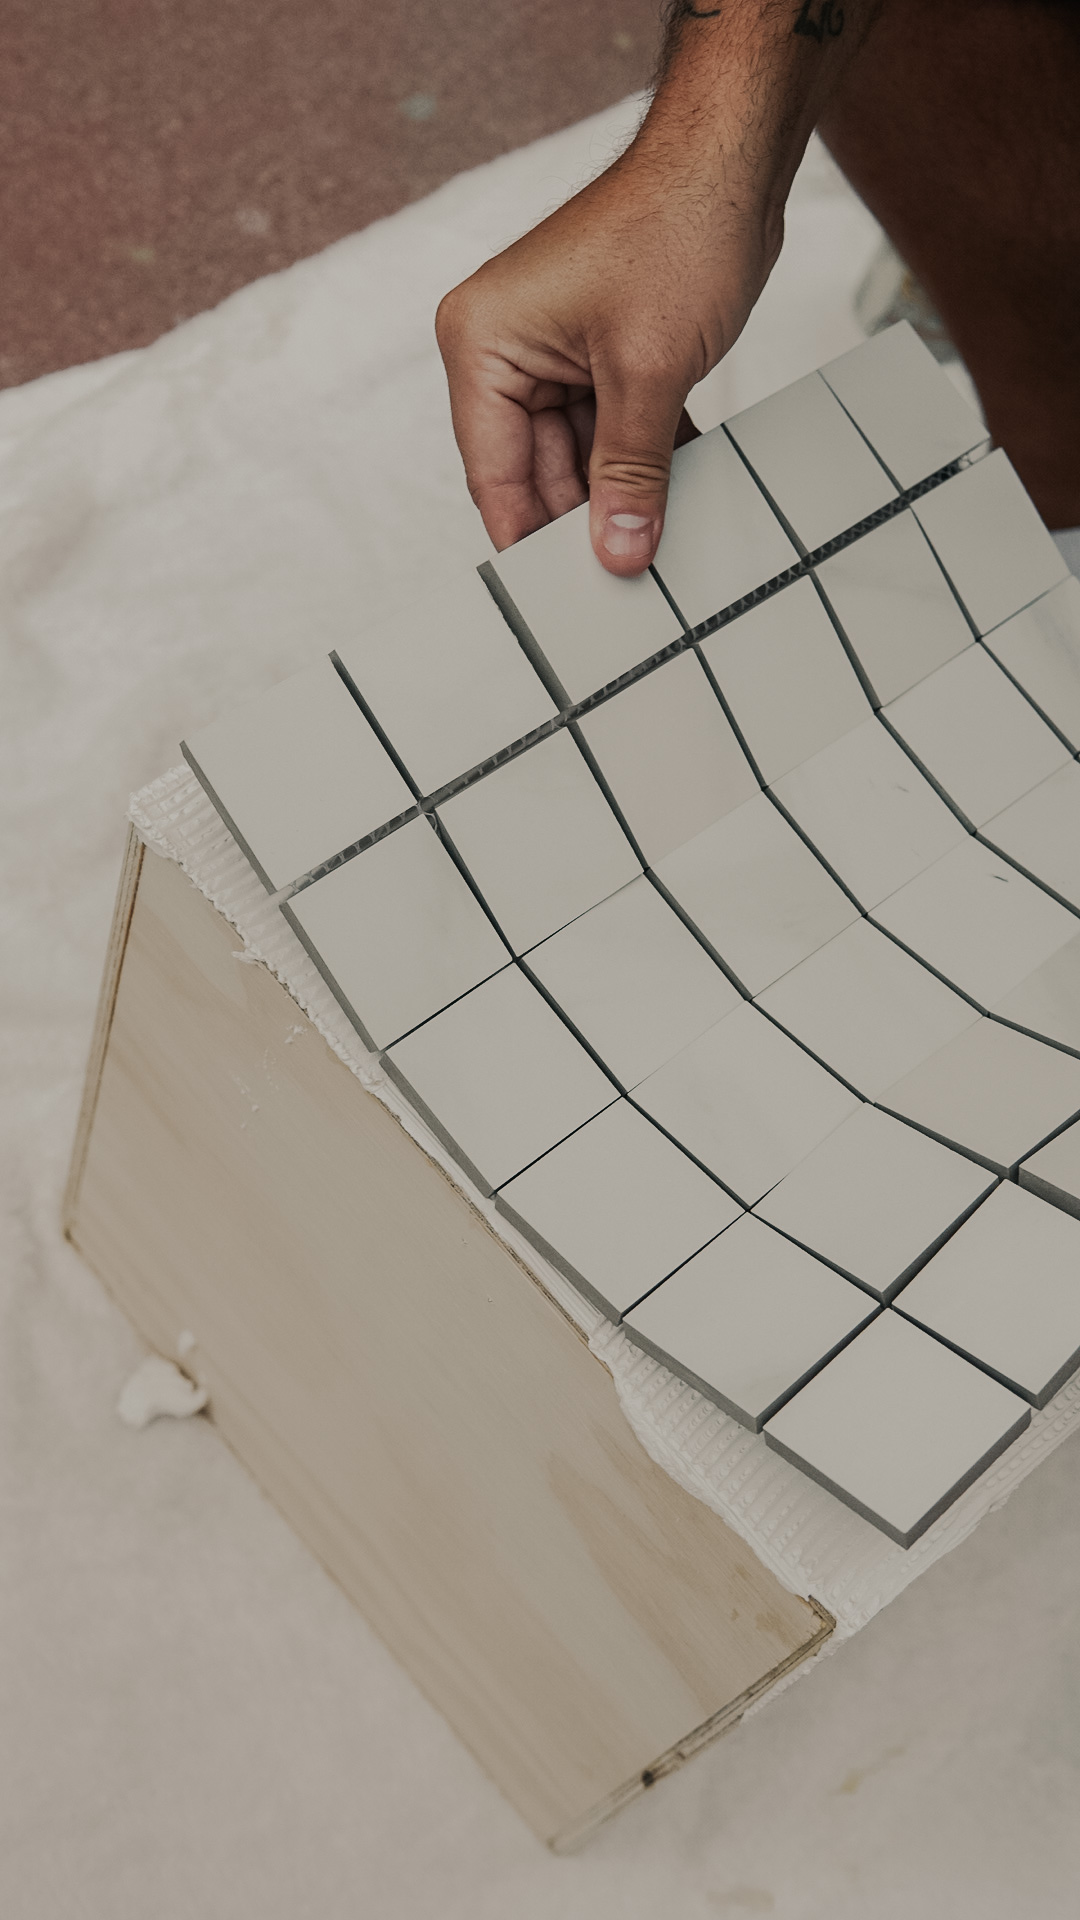
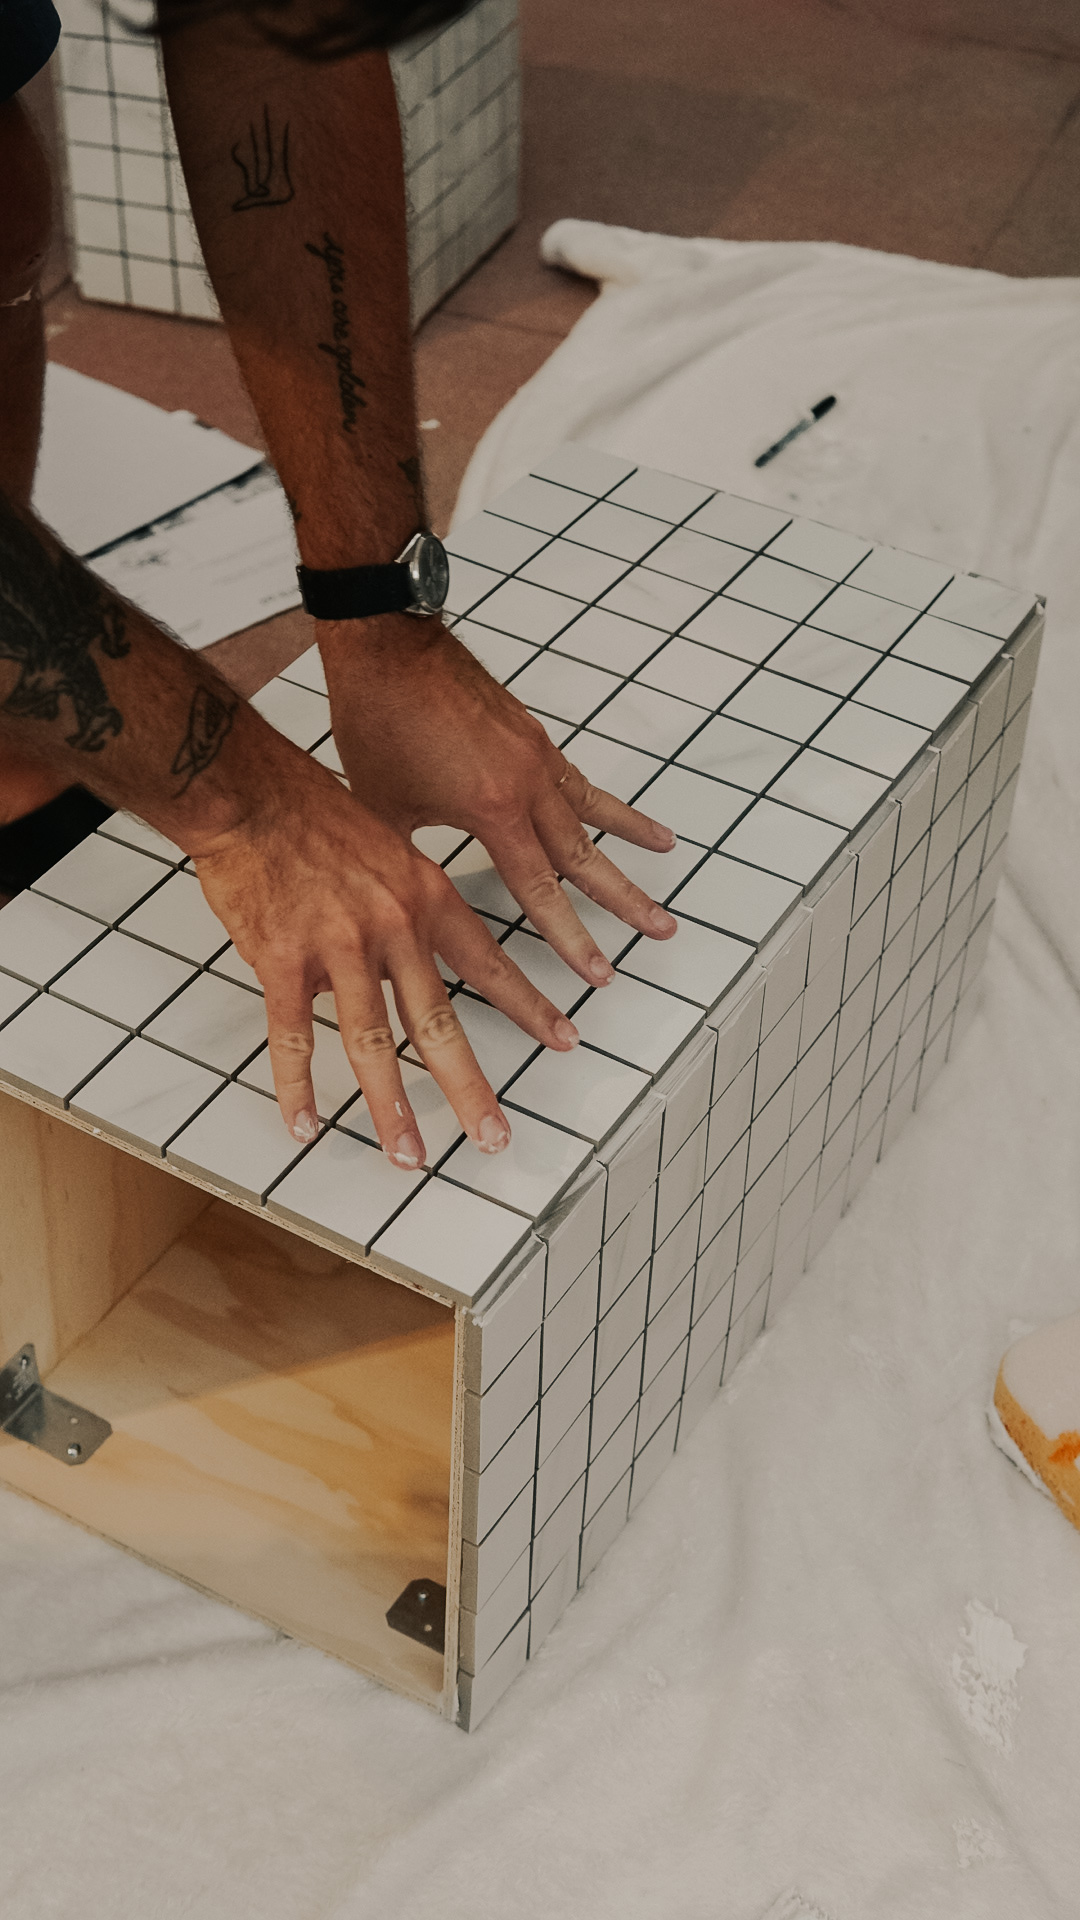
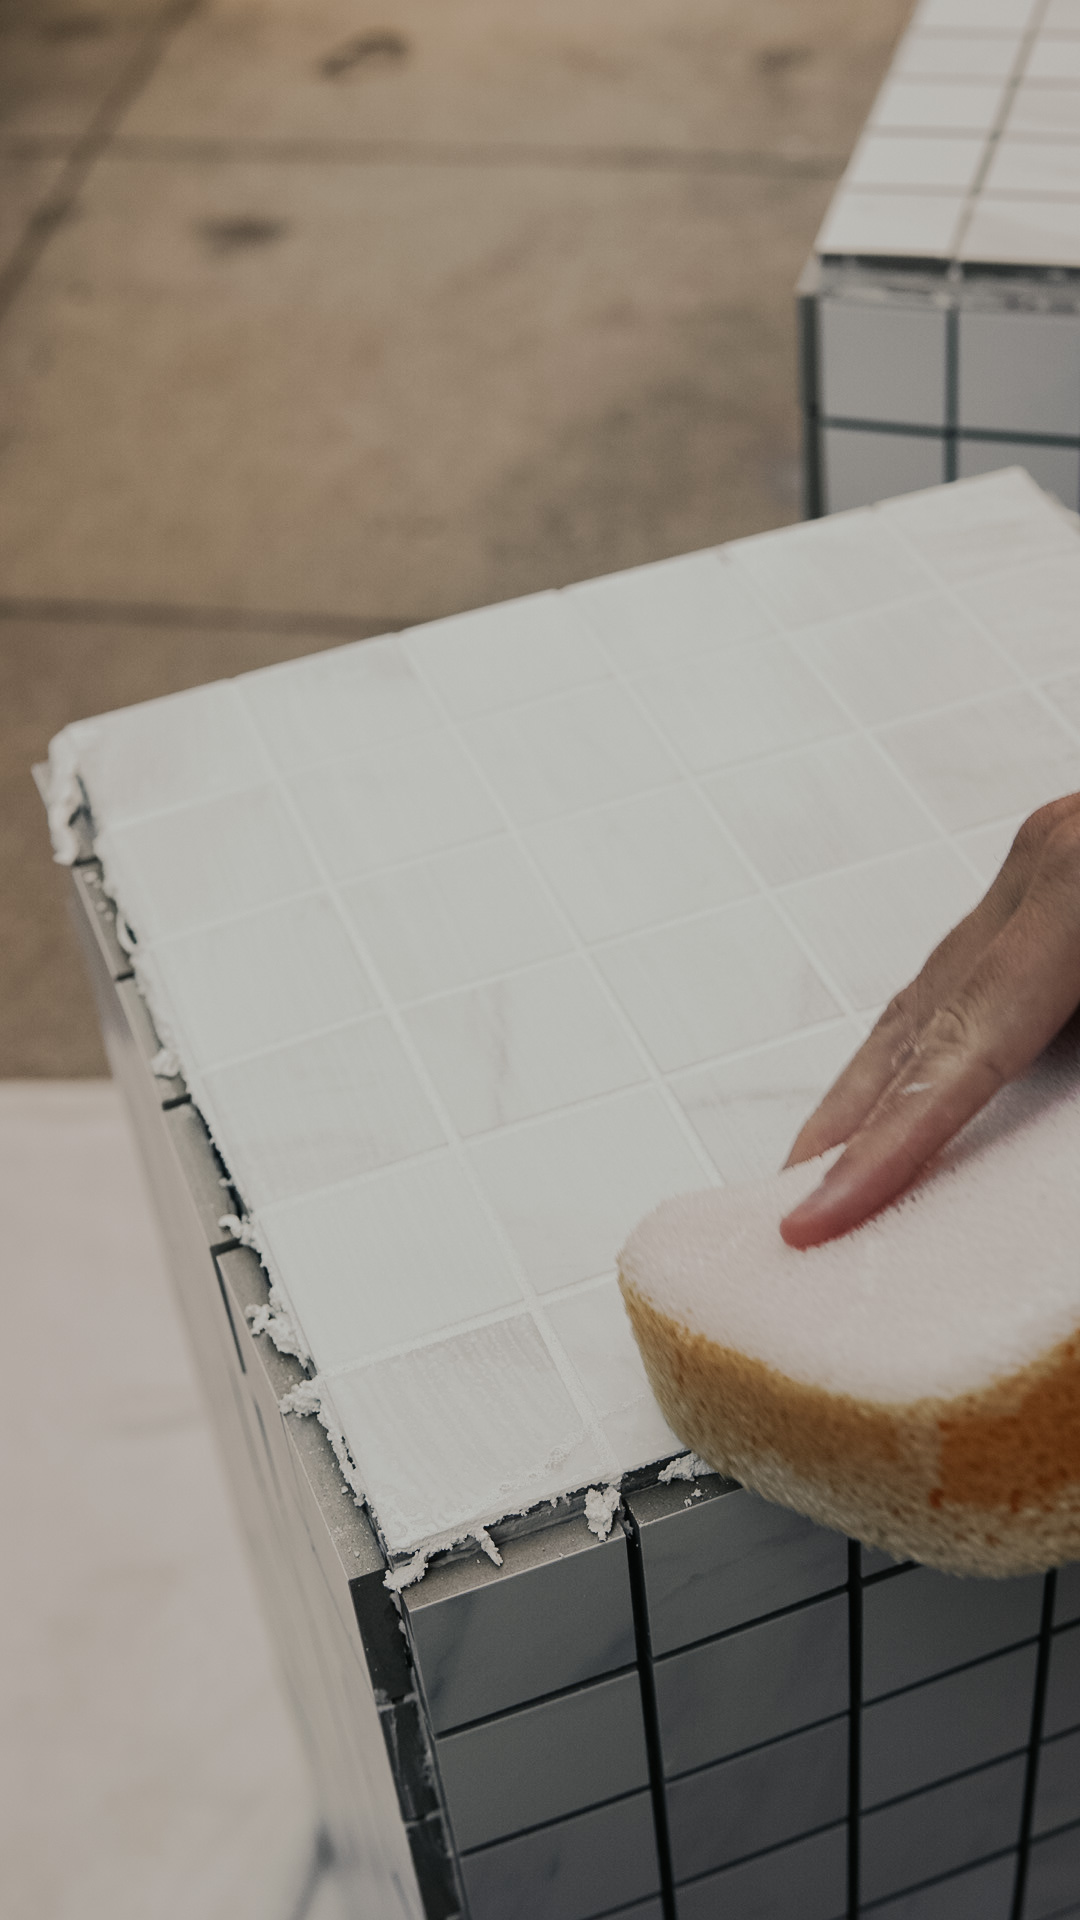
STEP THREE // ADHERE THE TILES
Obviously an extremely satisfying part of the process, adhering the tiles hinges on using your trowels to generously smooth the adhesive over the panels. You want to cover the panels, and then use the comb edge of the trowel to create a grooved surface. Lay the tile sheets down (VERY CAREFULLY!!!), press and shimmy into position as needed, and then wipe up excess adhesive with a damp cloth.
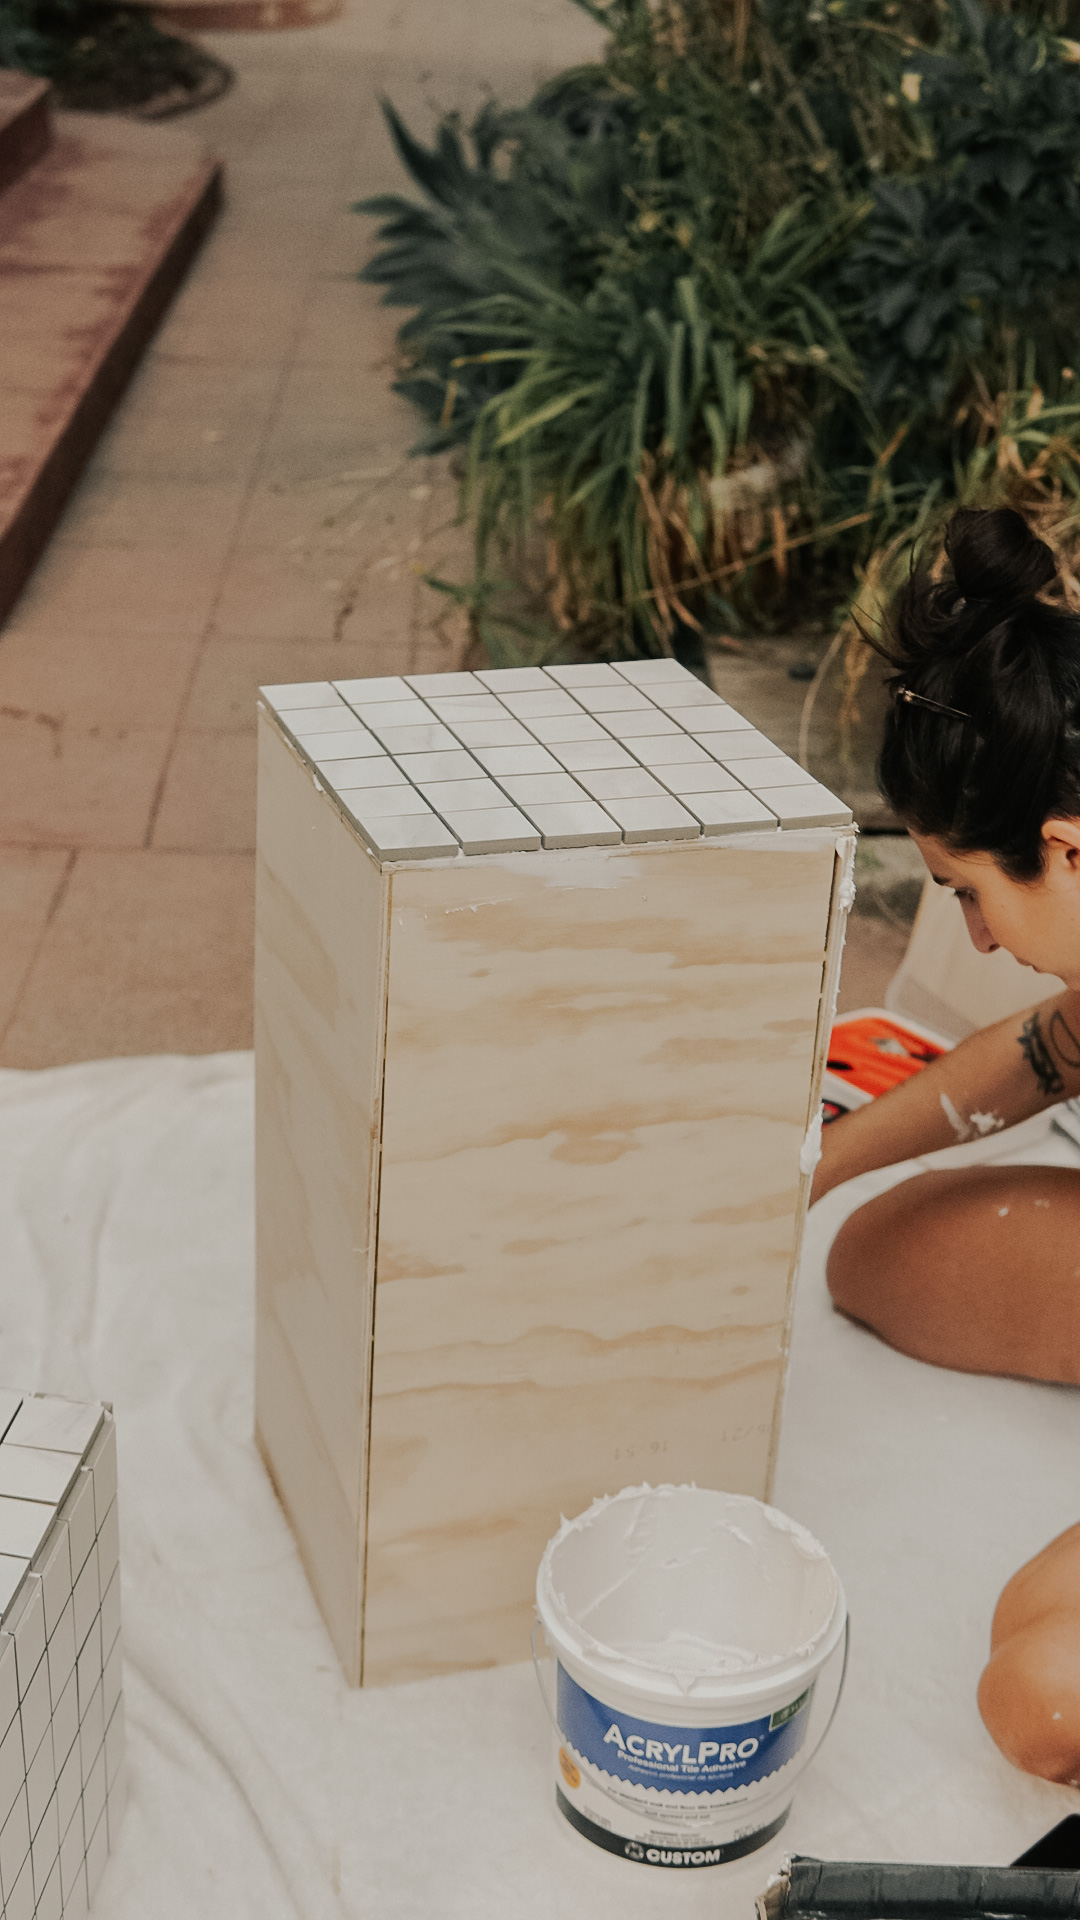
STEP FOUR // CHILL FOR A BIT
The most challenging part of the Tile Table DIY for me personally was waiting overnight for the tiles to dry. How *dare* they deprive me of the instant gratification I so crave?! Needless to say, it was worth the wait. We finished our adhesive phase around 5PM on a Saturday, and by 9AM Sunday morning we were ready to get back to it.
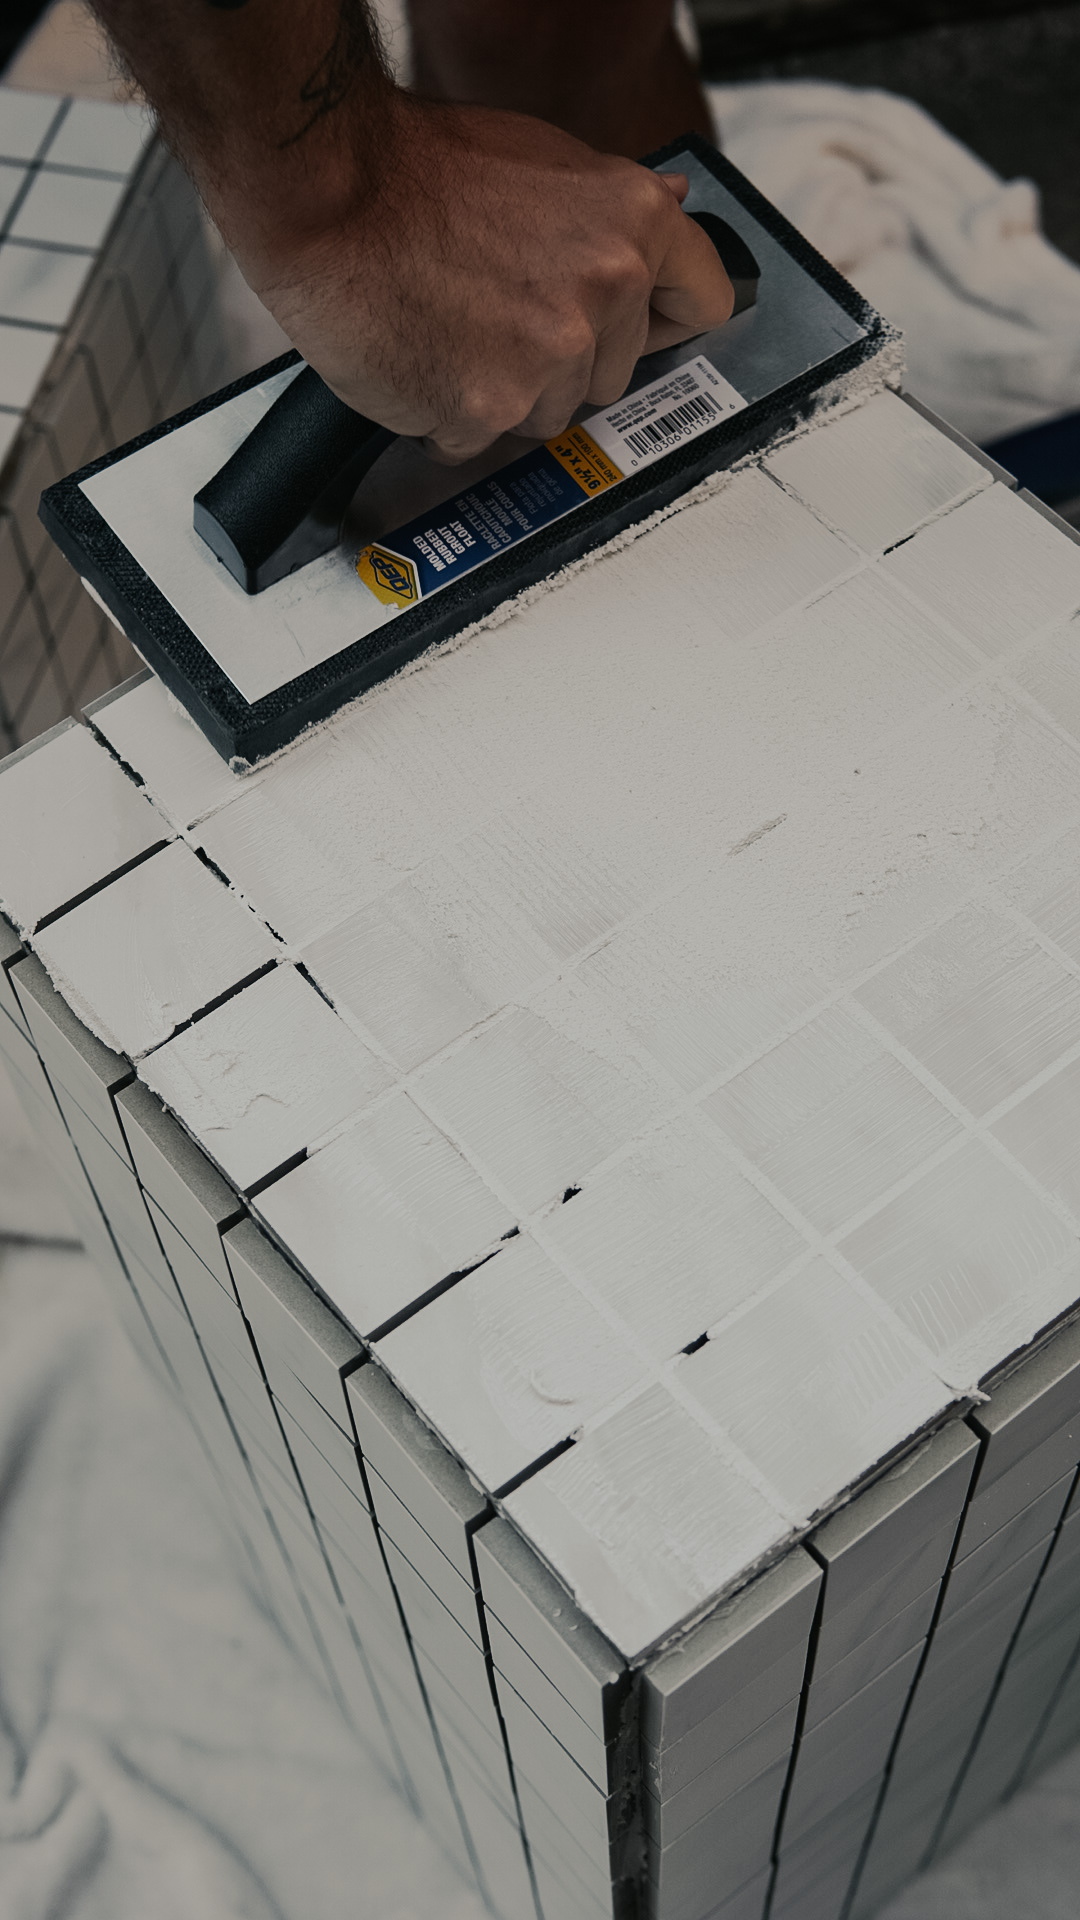
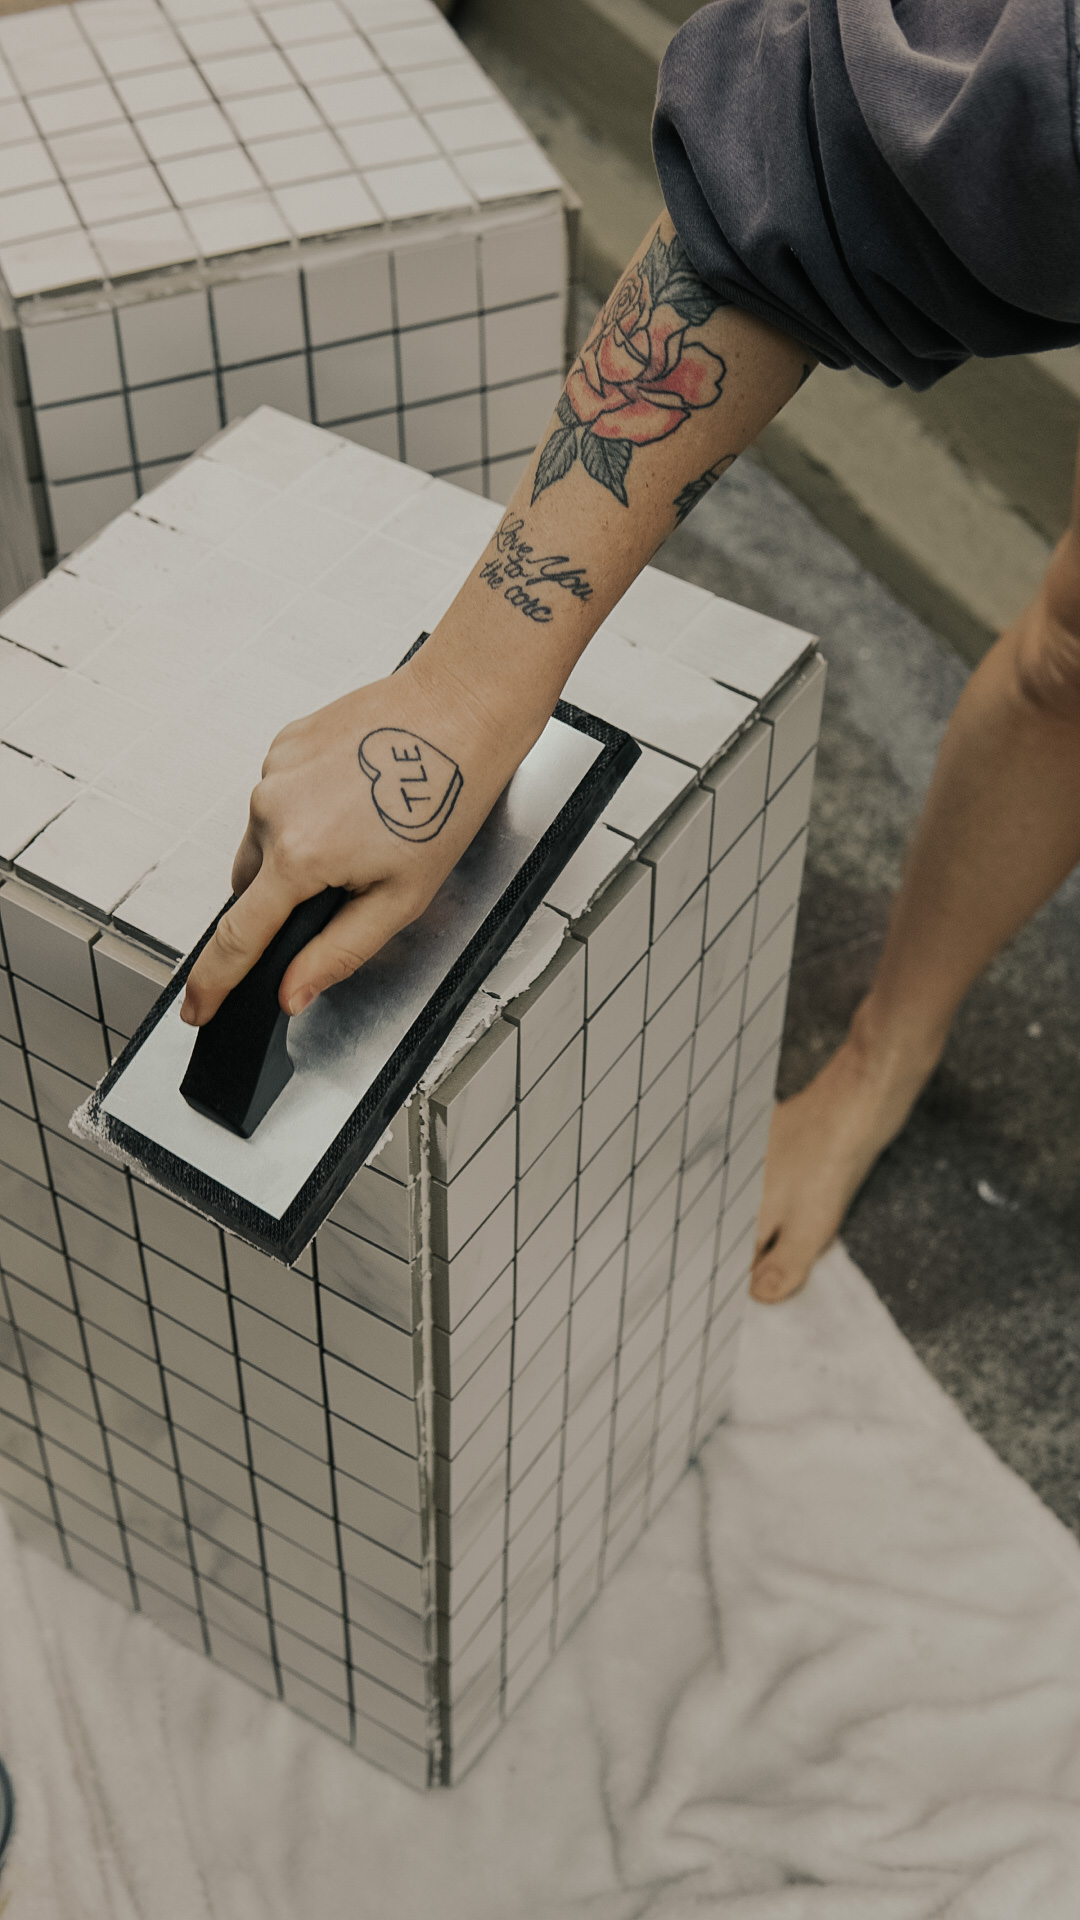
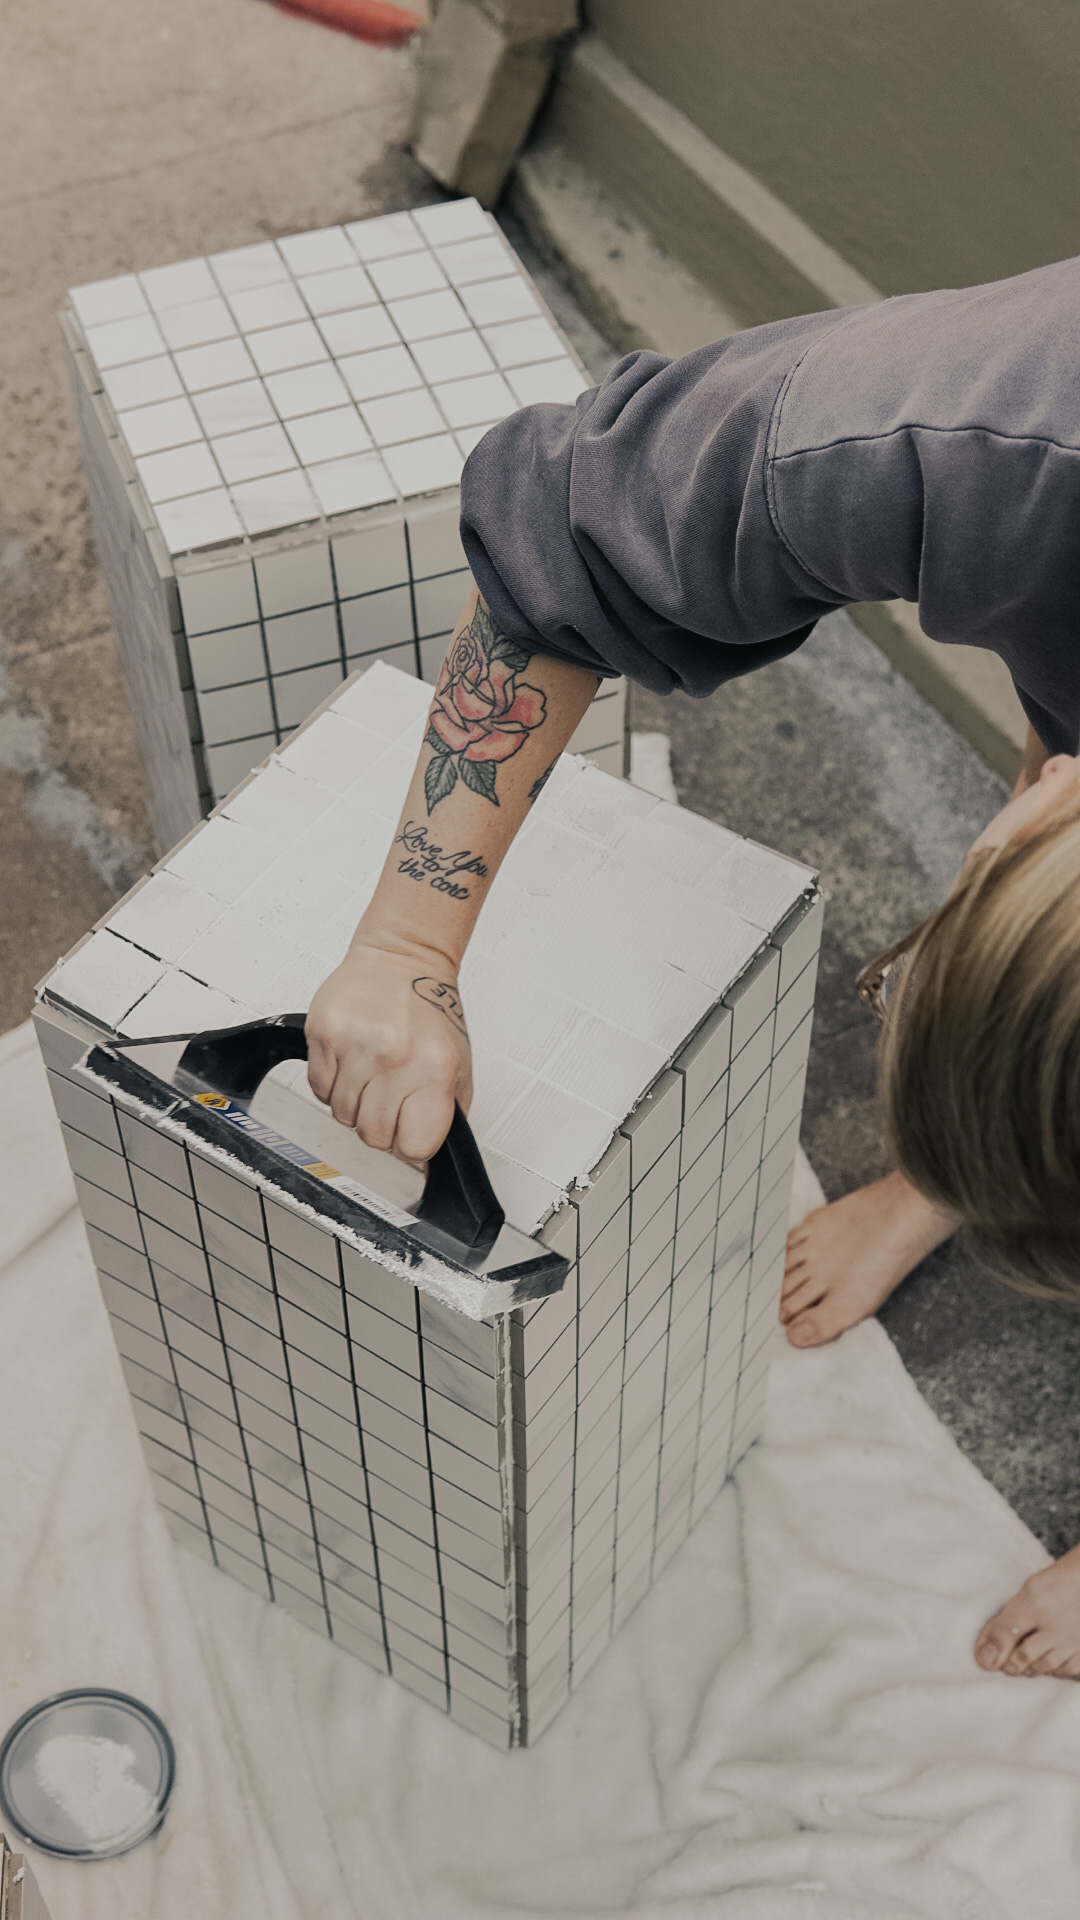
STEP FIVE // GROUT
A lengthy, but definitely *most* satisfying part of the Til Table DIY process – GROUT. First, buy more than you need (or live 3 mins from a Home Depot so you can go get more, like we did). Using your grout float, begin smacking that shit on and smoothing it into the cracks between the tile. You’ll want to make sure it’s level with the tile – and we had to go back and grout along the edges, too, to fill them in and make for a more smooth surface overall. After grouting each side, make sure to scrub excess off with the tile sponge to smooth it out, and then use the microfibre cloth to polish even further. AND OH, IT IS FUN.
STEP SIX // CHILL SOME MORE
This was an easier (read: shorter) wait. We were able to bring them in that evening and get them all set up. Wanna see how they turned out?!
THE MOMENT YOU CAME HERE FOR, I’M SURE:
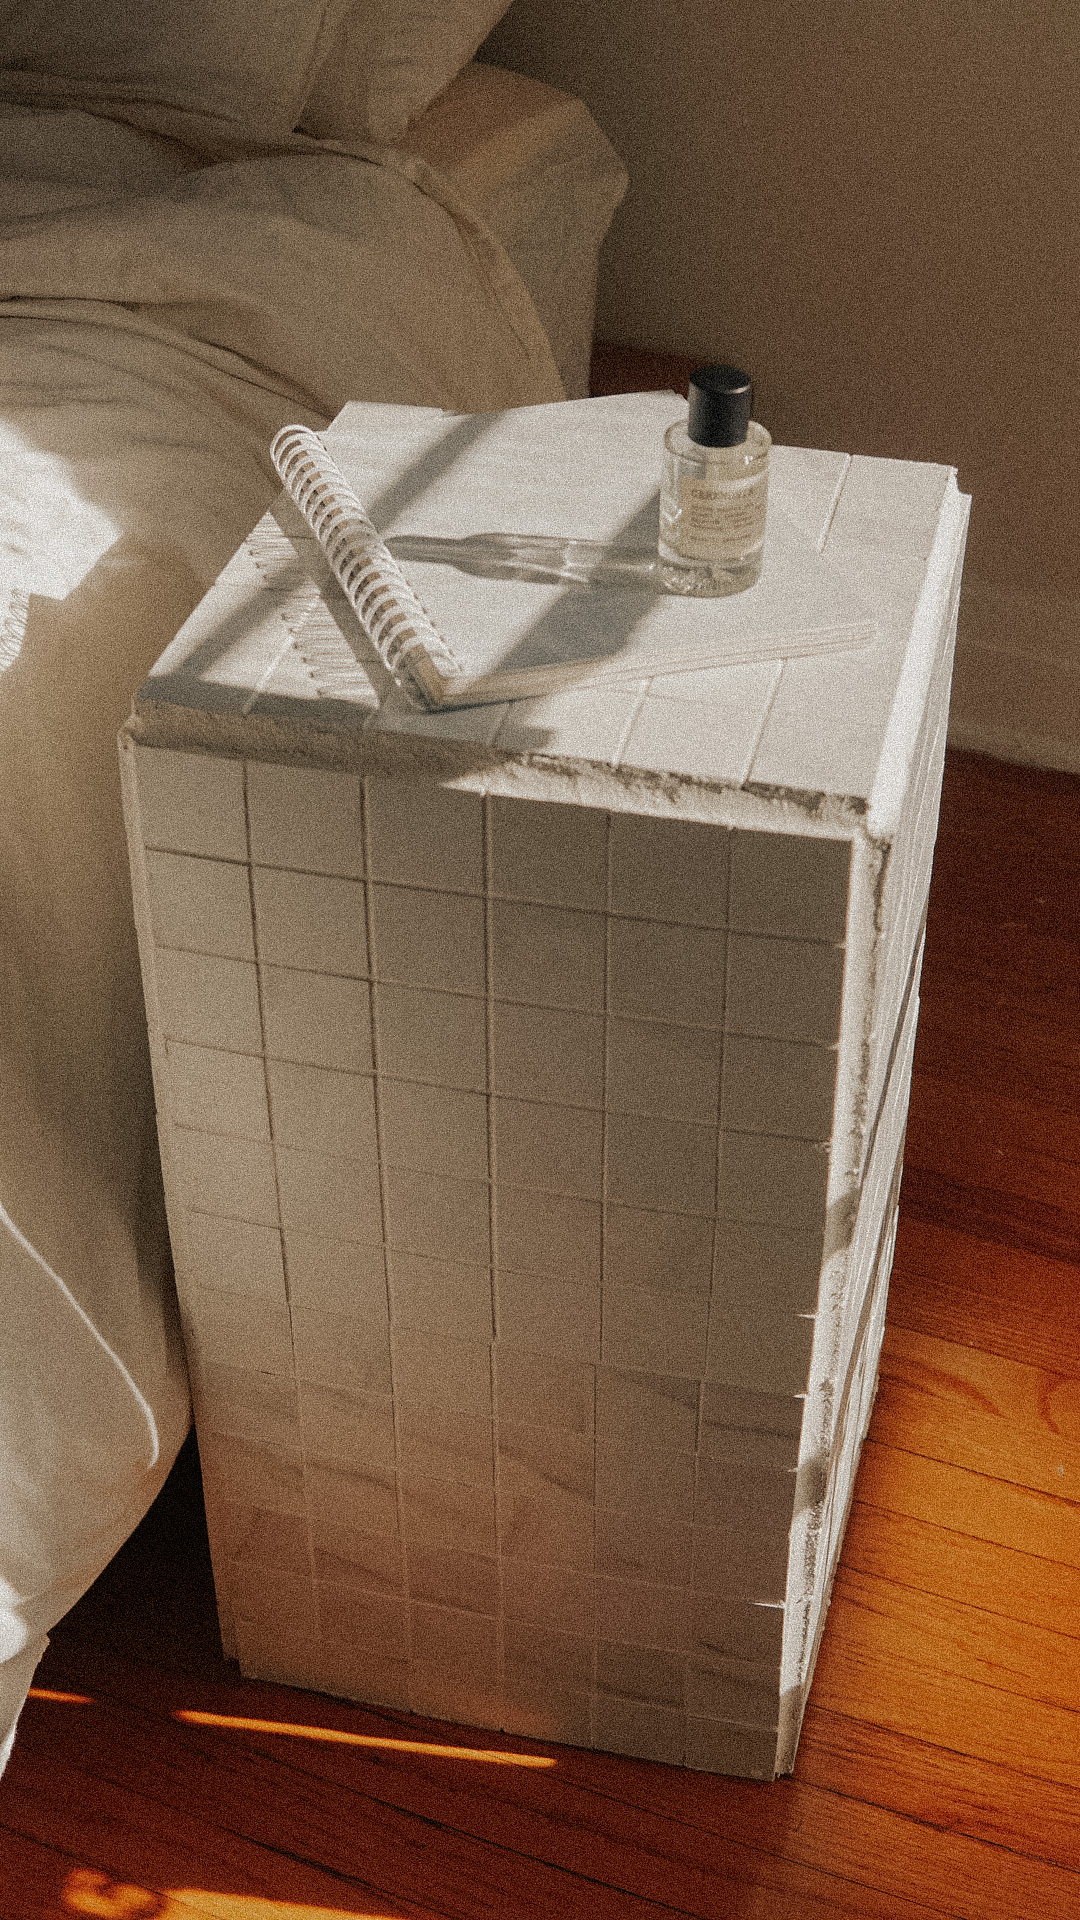
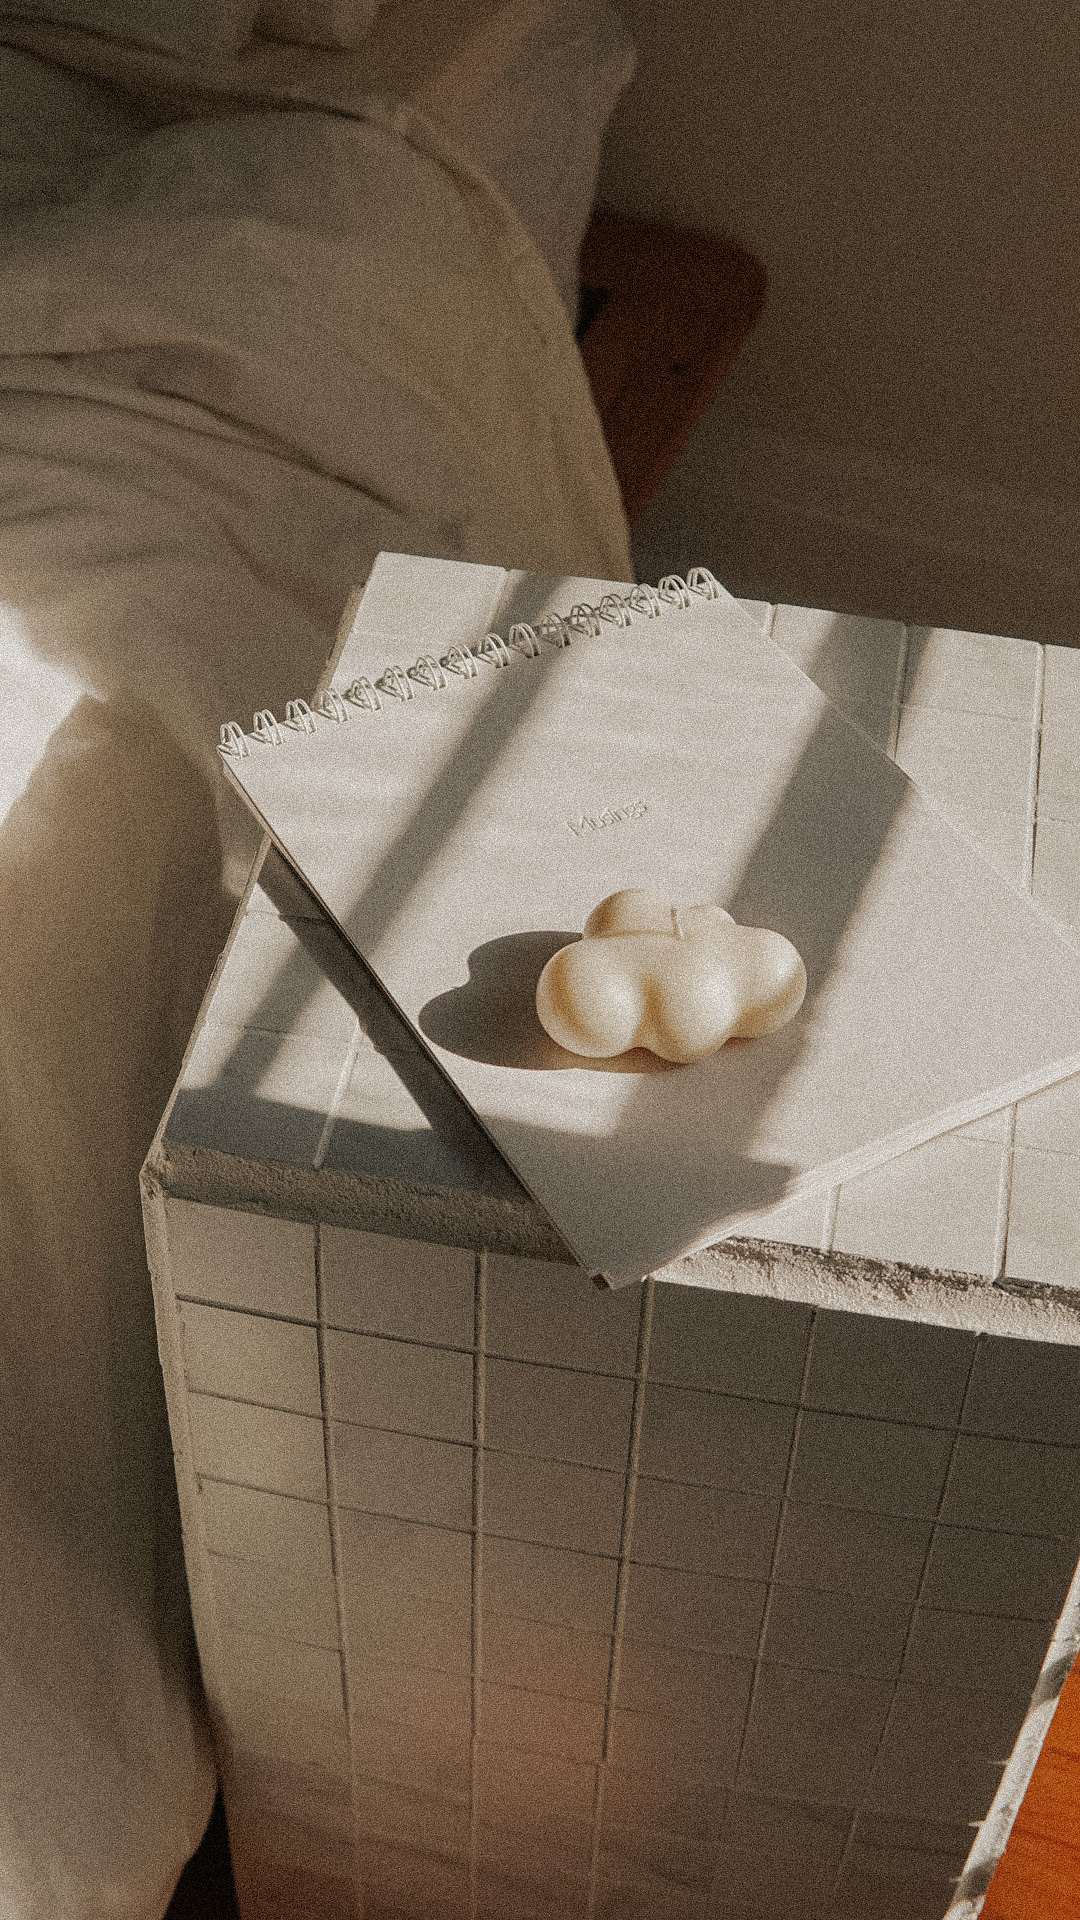
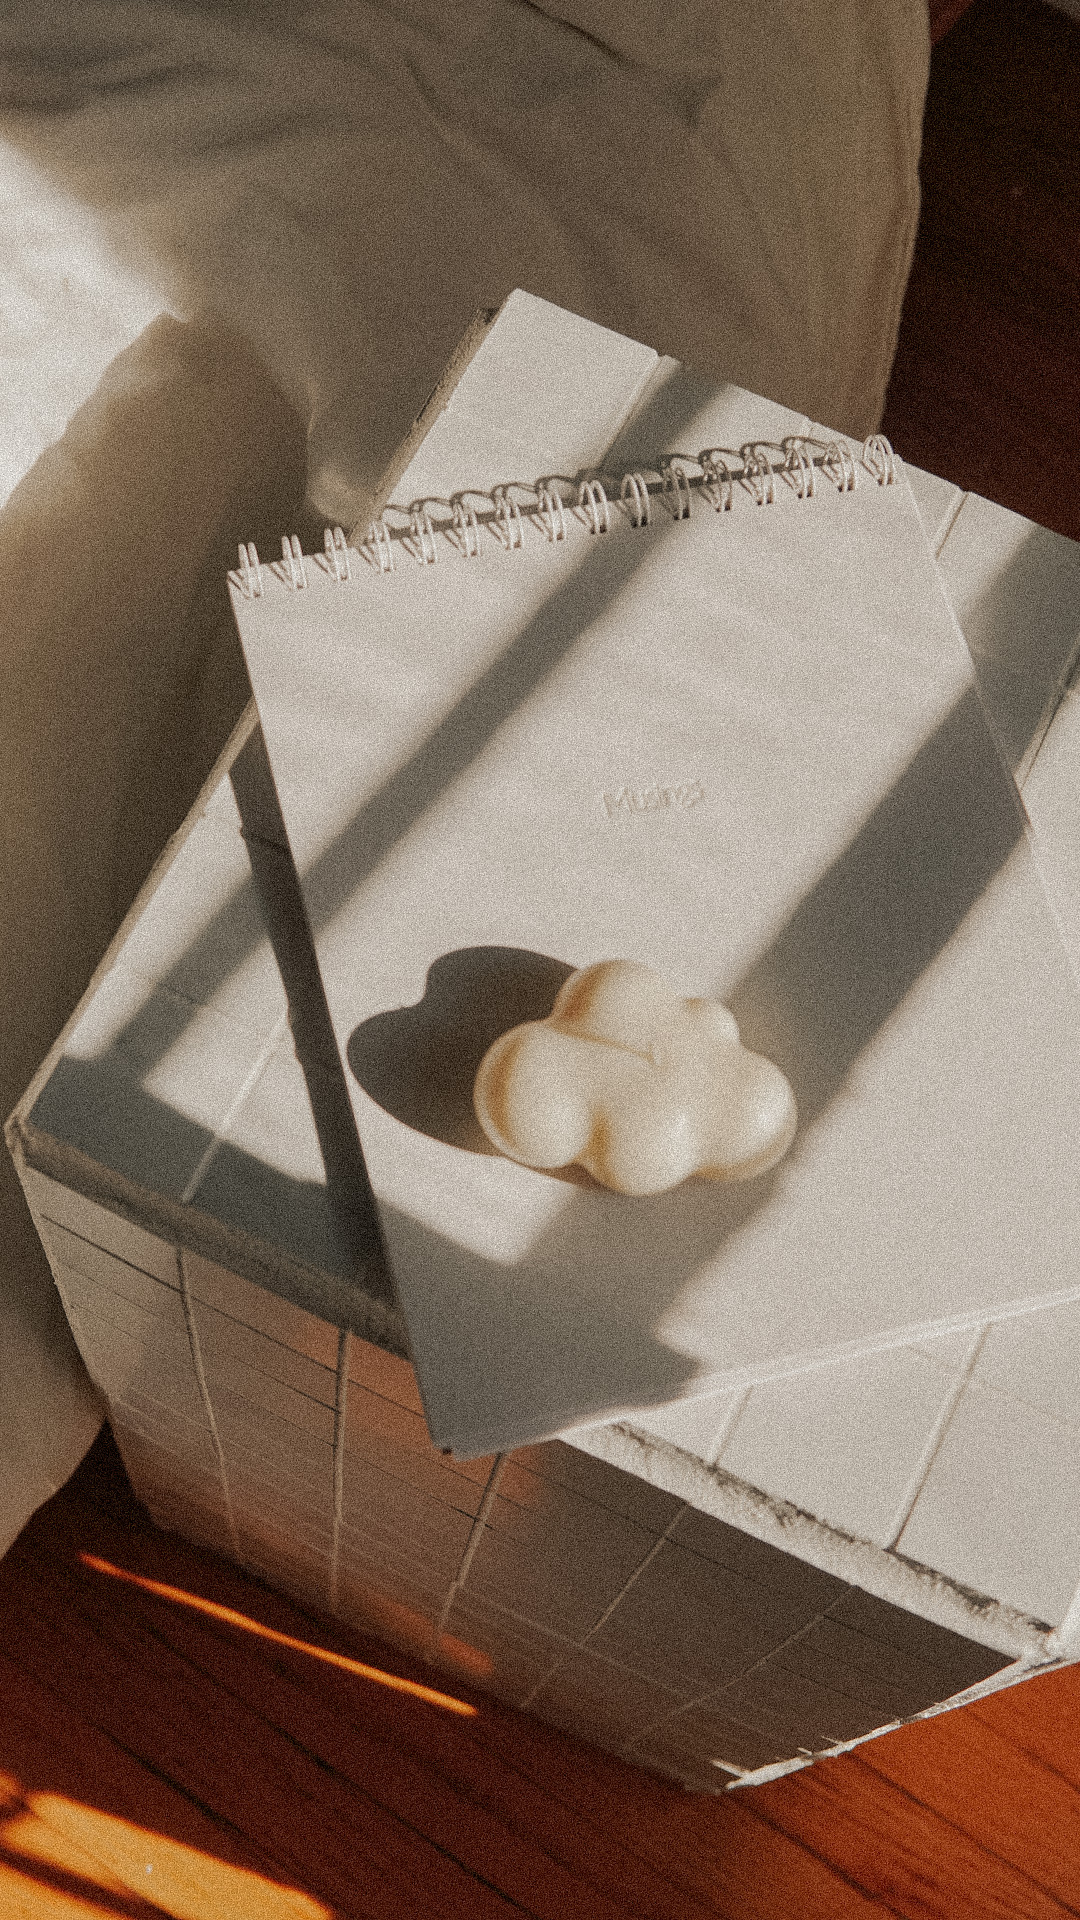
So, there you have it. The Tile Table DIY. Pretty easy. Pretty cute. Highly recommended.
Cheers.


Read the Comments +